
What You'll Need:
Instructions:
- Measure the exterior width of the frame (from edge to edge). Then, divide the total width in half to find the center point of the frame.
- Hold your frame to the wall at the desired position—for larger pieces, enlist a friend to help. (Use the best practices below to determine how far to place it in relation to other objects on the wall)
- Using a pencil, lightly mark the center point of the frame on the wall.
- On the back of the frame, find the center of the hanging wire. Gently pull the hanging wire up toward the top of the frame until taut. Measure the distance from where you are holding the wire taut to the top of the frame.

- Now, return to the wall. Starting at the pencil mark made in step 2, measure down the distance collected in step 3 and make a new mark. This is where you will place your nail.
- Position your hook and nail on the wall, aligning the bottom of the hook with the mark made in step 4. Hammer the nail through the hook at a downward angle.
- Use your hands to help guide the wire onto the hook. If your piece is too large to hang alone, have a friend hold the frame while you guide the wire onto the wall hanger.
- Once the wire is on the hook, use a level to check if the frame hangs evenly. Shift the frame to the left or right, as needed.
- Enjoy the view!
Best Practices:
The center of your artwork should be roughly 60" from the floor.

If hanging artwork above furniture, such as a couch or bed, the bottom of your frame should be 8-10" from the top of your furniture. Don't worry, it’s okay to trust your instincts on what looks balanced, too.

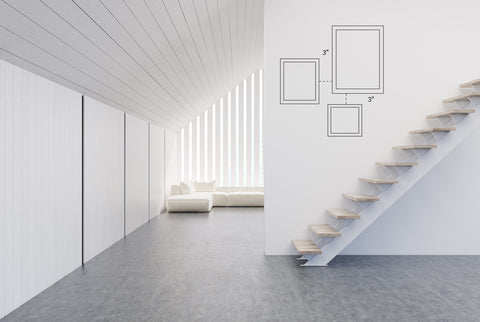
If hanging frames together to form a gallery wall, we recommend positioning frames 3" apart on all sides.
We’d love to see your framed artwork IRL—tag us (#loupeIRL) for a chance to be featured.
Instagram: @loupe_art